Learn how to set up a worm bin from scratch with this beginner's step-by-step guide. Choose the right bin, bedding, and worms to start composting today.
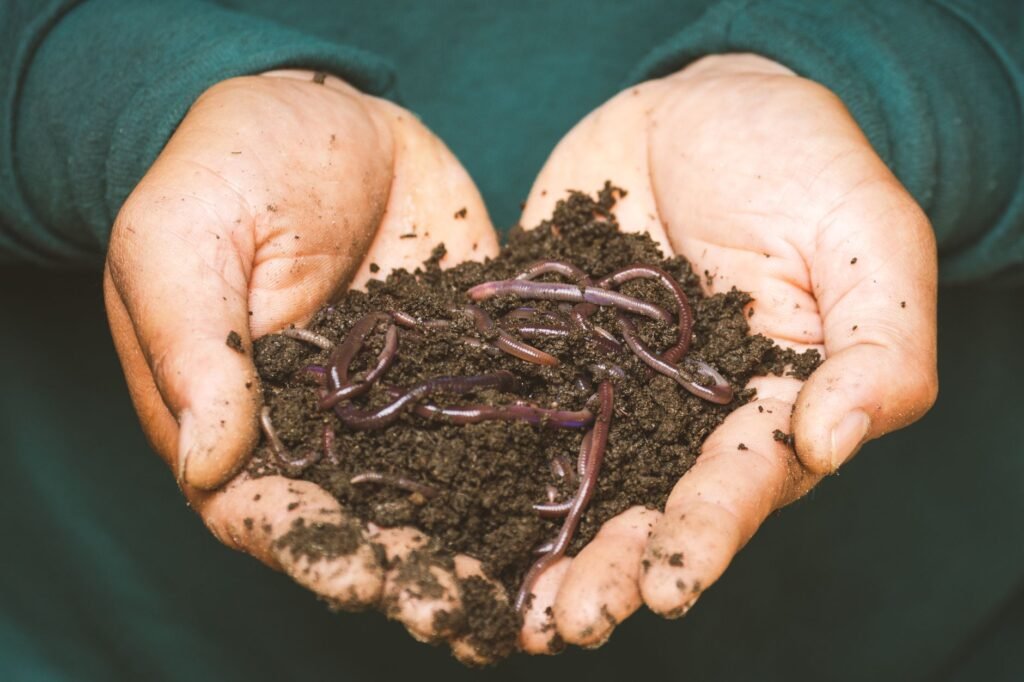
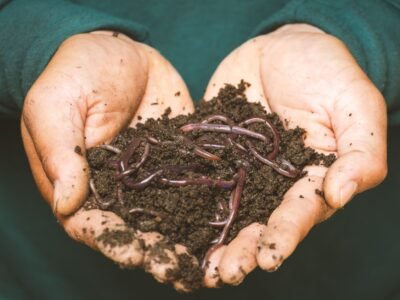
Vermicomposting — composting with worms — turns your kitchen scraps into one of the most nutrient-dense soil amendments available. Unlike a backyard compost pile, a worm bin works indoors, produces finished compost in as little as 60 to 90 days, and requires surprisingly little space. A single bin sitting under your kitchen sink or in a garage corner can process several pounds of food waste every week.
The learning curve is gentle. Worms are resilient, and the system is forgiving as long as you get the fundamentals right from the start. This guide walks you through every decision you need to make — bin type, bedding, worm species, moisture, feeding — so your bin is healthy and productive from day one rather than something you troubleshoot for months.
Worm castings are loaded with beneficial microbes, humic acids, and plant-available nutrients. A small handful mixed into potting soil or garden beds noticeably improves plant health and yield.
Finished vermicompost replaces store-bought fertilizers and soil amendments. Over a single growing season, a productive bin can save a home gardener a meaningful amount on inputs.
Food scraps in landfills decompose anaerobically and release methane. Feeding that waste to worms instead keeps it out of the waste stream entirely and turns a problem into a resource.
Liquid that drains from your bin — often called leachate — can be diluted and used as a liquid fertilizer. Many worm bin designs include a spigot specifically for collecting it.
Because worms prefer temperatures between 55°F and 77°F (13°C–25°C), a bin kept inside your home runs continuously through winter when outdoor composting slows or stops completely.
You can buy a purpose-built flow-through or stacking bin (such as a Worm Factory 360) or drill your own from a 10–18 gallon opaque plastic storage tote. Opaque sides keep light out, which worms prefer. Avoid clear bins unless you wrap them in something dark.
Red wigglers are the species of choice for vermicomposting. They thrive in the top few inches of organic material, reproduce quickly, and tolerate the temperature swings of indoor life. Do not use common earthworms dug from your garden — they are soil dwellers and will not thrive in a bin environment.
Bedding gives worms a habitat to move through and provides carbon to balance the nitrogen in food scraps. Shredded cardboard, shredded newspaper (black ink only), aged coconut coir, or a mix of all three all work well. Avoid glossy paper and anything with heavy colored inks.
Your bedding needs to be as moist as a wrung-out sponge — damp throughout but not dripping. Tap water that has sat out for an hour (to off-gas chlorine) or filtered water is ideal. Moisture level is one of the most critical factors in worm bin health.
Gather a small amount of food scraps before your worms arrive so you can feed them on day one. Fruit and vegetable peels, coffee grounds, and tea bags are ideal starters. Avoid meat, dairy, and oily foods until you are comfortable with the system.
Gloves are optional but useful when mixing bedding or harvesting castings. A small hand trowel or old kitchen fork helps you bury food scraps without disturbing worms more than necessary.
If you are using a DIY tote, drill 10 to 15 small holes (about 1/8 inch) in the lid for air circulation and 8 to 10 holes in the bottom for drainage. Place the bin on top of a second tote or a tray to catch any liquid that drains out. If you are using a commercial stacking bin, assemble it per the manufacturer’s instructions and place the collection tray underneath.
Shred cardboard or newspaper into strips roughly 1 inch wide. Soak the strips in water for a few minutes, then squeeze out the excess until the material feels like a wrung-out sponge. Fill your bin to about two-thirds full with this moistened bedding. Fluff it up so it is loose and airy rather than compacted — worms need oxygen to survive.
Sprinkle a handful of garden soil or finished compost over the bedding. This introduces the grit worms use for digestion (they have no teeth and rely on particles in their gizzard to grind food) and adds beneficial microorganisms that help break down organic matter in the bin.
Open the bag of worms and gently place them on top of the bedding. Leave the bin lid off or propped open and shine a light over it for 15 to 30 minutes. Worms are photophobic — they will quickly burrow down into the bedding to escape the light. This confirms they are alive and active. Once they have burrowed, you can close the lid.
Bury a small amount of food scraps — roughly a cup to start — in one corner of the bin, covering them completely with bedding. Burying food prevents fruit flies, reduces odor, and speeds up decomposition. Resist the urge to overfeed in the first two weeks. Let the worms settle in and get comfortable before ramping up the volume.
Place your bin somewhere with a stable temperature between 55°F and 77°F (13°C–25°C). Under a kitchen sink, in a basement, in a laundry room, or inside a garage (during mild weather) all work well. Keep the bin away from direct sunlight and heat sources. Avoid anywhere that gets below 50°F or above 84°F for extended periods, as both extremes stress or kill worms.
After the first week, check the bin every two to three days. Feed only when the previous scraps are mostly gone or well on their way to decomposing. A pound of red wigglers can process roughly half a pound of food scraps per day under ideal conditions, but it takes a few weeks for a new bin population to ramp up. Rotate feeding spots around the bin so worms follow the food and the entire bin breaks down evenly.
Every week or so, push your hand into the bedding. It should feel consistently moist but never soggy. If it feels dry, mist it with water. If it feels wet and smells sour or anaerobic, add dry shredded cardboard and mix gently to improve drainage and airflow. Keeping moisture and aeration balanced is the single most important ongoing maintenance task.
Worms are not picky, but certain foods support a healthy, odor-free bin while others cause problems ranging from pest infestations to dangerous pH swings. Use this as your quick reference every time you are about to add scraps.
A healthy, well-functioning worm bin has a few telltale signs. The smell should be earthy — similar to forest floor soil — not sour, sulfurous, or rotting. You should be able to find worms actively moving through the bedding when you dig in. Over the first several weeks, you will notice the bedding volume decreasing and a dark, crumbly material beginning to accumulate at the bottom of the bin. That dark material is worm castings, and it is exactly what you are working toward.
If you notice worms clustering near the lid or trying to escape, something is off — usually too much moisture, an anaerobic pocket, or a food item that is irritating them. Do not panic. Remove any offending food, add dry bedding, and mix gently to reintroduce oxygen. Worms are resilient, and most problems in a new bin are solved by adjusting moisture and feeding habits rather than starting over. Give your bin 30 to 60 days before expecting a harvestable amount of castings, and by that point you will have a clear picture of what your specific bin needs to thrive.
Most beginners start with one pound of red wigglers, which is roughly 800 to 1,000 worms. That is enough to process a meaningful amount of food waste and will multiply on its own within a few months. If you generate a lot of kitchen scraps, starting with two pounds speeds up the process, but one pound is the standard and widely available quantity from most worm suppliers.
A properly managed worm bin should smell like rich, earthy soil — not unpleasant at all. Bad odors almost always trace back to overfeeding, too much moisture, or adding foods like meat and dairy that do not belong in the bin. If your bin smells off, stop feeding for a few days, add dry shredded cardboard, mix gently to improve airflow, and the odor should resolve within a day or two.
Yes, and for most people indoors is the best location. Red wigglers prefer temperatures between 55°F and 77°F, which matches the typical indoor environment. A well-maintained bin produces no noticeable odor and attracts no pests. Many people keep bins in their kitchen, under a sink, or in a closet without any issues. The main thing to avoid indoors is overfeeding, which is the most common cause of odor and fruit flies.
In a new bin, expect your first harvestable castings in about 60 to 90 days. The timeline depends on how many worms you started with, how consistently you feed them, and how well moisture and temperature are maintained. You will know it is time to harvest when a significant portion of the bin’s contents looks dark, crumbly, and uniform — more like finished compost than recognizable bedding or food scraps.
Fruit flies are the most common nuisance in new worm bins and are almost always caused by food scraps left exposed on the surface. The fix is straightforward: always bury food scraps completely under bedding, avoid adding fruit with intact skin (blend or freeze it first to break down the skin), and place a layer of dry shredded cardboard directly on top of the bedding as a barrier. A small piece of window screen under the lid can also block adult flies from entering.
Everything you need to get started with vermicomposting.
Share tips, ask questions and learn from thousands of worm lovers!
Join Community