Worm bin mistakes can wipe out your herd in days. Learn the 8 worst habits new owners make and fix them fast to keep your worms thriving year-round.
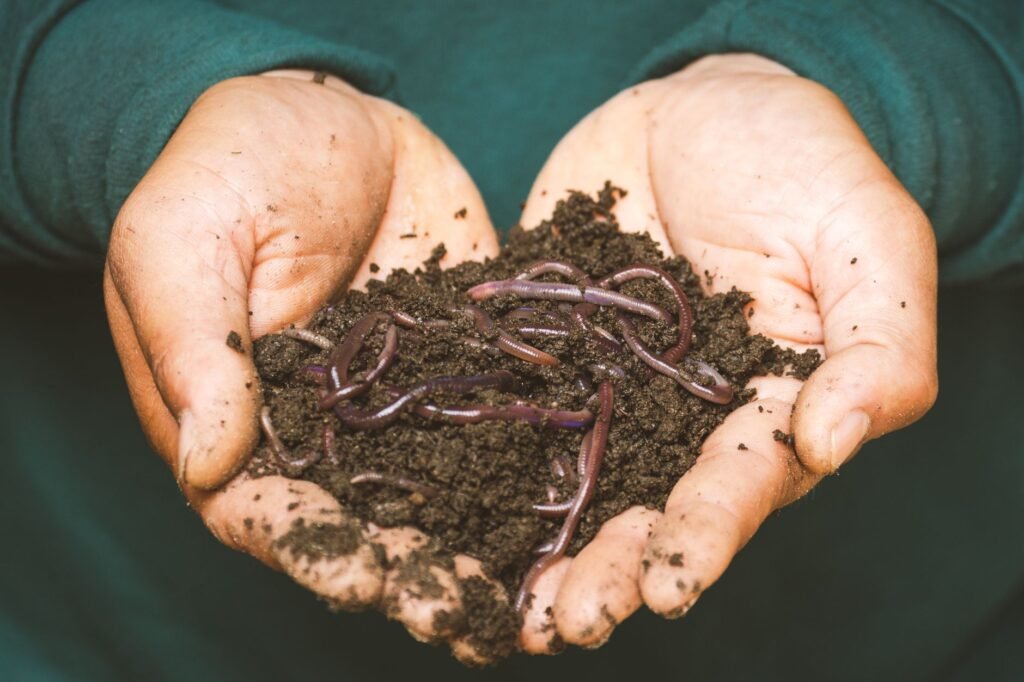
Worm bin mistakes are far more common than most beginner guides admit, and the frustrating part is that many of them look like the right thing to do at first glance.
Overfeeding feels generous. Skipping bedding feels efficient. Adding citrus feels like recycling. Every one of those instincts can crash a healthy bin within a week. This article covers the eight habits that kill more worm bins than anything else — with specific fixes so you can course-correct before the damage is permanent.
Vermicomposting looks simple on the surface: put food in a box, worms eat it, castings come out. That simplicity is exactly what makes the early mistakes so predictable. New owners apply logic from gardening or general composting — more food means faster breakdown, wetter is better, any organic material counts — and none of those rules transfer cleanly to a worm bin.
Worms are not garbage disposals. They are living animals with a narrow comfort zone: roughly 55–77°F (13–25°C), moisture around 70–80%, and a pH close to neutral. Push any one of those variables too far and the bin doesn’t just slow down — it collapses. The good news is that every mistake on this list is fixable once you know what you’re actually looking at.
A pound of red wigglers (Eisenia fetida) can process roughly half a pound of food scraps per day under ideal conditions — but ideal conditions take weeks to establish. In a new bin, start with a quarter of that. Pile uneaten food sits, heats up through bacterial action, and creates anaerobic pockets that smell like a sewer and send worms crawling for the lid. The fix: bury small amounts in different corners of the bin every 2–3 days and only add more once the previous feeding has mostly disappeared.
Bedding is not decoration. Shredded cardboard, aged newspaper, and coconut coir absorb excess moisture, provide carbon to balance nitrogen-heavy food scraps, and give worms somewhere to retreat when a feeding gets too acidic or hot. A good starting ratio is roughly 3 parts bedding to 1 part food by volume. Most new owners flip that ratio or skip a bedding refresh entirely for months. Add a fresh handful of torn cardboard every time you feed — it takes ten seconds and prevents half the problems on this list.
Squeeze a handful of bin material. If water streams out, it’s too wet. If it crumbles and feels dry, it’s too dry. You want a few drops to fall when you squeeze hard — the classic ‘wrung-out sponge’ standard. Too wet and the bin goes anaerobic within days; too dry and worms stop moving, stop eating, and eventually die of dehydration. If your bin is too wet, add dry shredded cardboard and leave the lid slightly ajar for 24 hours. If it’s too dry, mist with a spray bottle and check again in 12 hours.
Citrus peels contain d-limonene, a natural solvent that is toxic to worms in concentration. Onions and garlic create an acidic, sulfur-rich environment worms actively flee. Meat, fish, and dairy decompose into compounds that attract pests and produce hydrogen sulfide — the rotten-egg smell that signals a bin in serious trouble. None of these are worth the risk, especially in a bin that’s still getting established. Stick to fruit and vegetable scraps, coffee grounds (in moderation), and plain grains for the first three months.
Below 50°F (10°C) worms slow to a near-standstill and can die if it drops below freezing. Above 84°F (29°C) they try to escape, and above 95°F (35°C) they die within hours. A bin sitting on a concrete garage floor in January or a sunny balcony in July is a bin in danger. Move it indoors, insulate with a blanket of extra bedding, or use a seedling heat mat in winter. In summer, freeze a water bottle and lay it on top of the bedding to drop the temperature a few critical degrees.
A healthy bin needs a quick look every two to three days — not a full harvest, just a visual check. Lift the lid, poke around gently, and look for warning signs: worms clustered at the top or sides (escaping), a sour or sulfur smell (anaerobic conditions), visible mold beyond the normal white surface mold, or a population of fruit flies that’s exploding rather than staying manageable. Catching any of these at day three is a ten-minute fix. Catching them at day fourteen is a potential bin restart.
Laying food on top of the bedding surface is one of the fastest ways to invite fruit flies, fungus gnats, and other pests. Worms feed from below and from within the material, not from the surface. Always bury scraps 2–3 inches deep, rotate burial spots across the bin, and cover the feeding pocket with a thin layer of damp bedding. This single habit change eliminates most pest problems before they start.
Harvesting too early means you’re pulling out unfinished material full of food scraps and worm eggs — you lose productivity and disrupt the colony. Harvesting too late means worms are living in their own waste with nowhere to go, which stresses the population and slows casting production dramatically. In a well-managed bin, a full harvest is typically ready every 3–4 months. The material should look like dark, crumbly soil with no recognizable food pieces and a clean, earthy smell before you harvest.
One of the most persistent worm bin mistakes is treating the bin like a general compost pile. Worm bins are a closed, moist, temperature-sensitive environment — the list of what works well is shorter than most people expect.
A bin free of the common worm bin mistakes produces dense, nutrient-rich vermicast on a predictable schedule — roughly one full harvest per season.
A healthy colony doubles in population roughly every 60–90 days. Get the basics right and you’ll never need to buy worms again.
A mature 2-tray bin can process 3–5 pounds of food scraps per week — that’s meaningful landfill diversion without a curbside pickup.
Drain liquid from your bin, dilute 1:10 with water, and you have a free liquid fertilizer that works on seedlings, houseplants, and garden beds.
Food waste in landfill produces methane, a greenhouse gas roughly 25 times more potent than CO2 over a 100-year period. Vermicomposting keeps that carbon in the soil instead.
A basic probe thermometer ($8–12) tells you exactly when a bin is overheating before the worms start escaping. Check it weekly in summer.
Fine-mist spray bottles let you add moisture in controlled amounts rather than dumping water in and overshooting the moisture target in seconds.
Weighing food scraps before you add them removes the guesswork from feeding rates. Start at 1/4 lb per pound of worms and adjust based on consumption speed.
Keep a bag of shredded cardboard or coconut coir next to the bin. Having it on hand means you’ll actually add it at each feeding instead of skipping the step.
Thin nitrile gloves make bin checks and harvesting much more comfortable — and you’re far more likely to check the bin regularly if the process isn’t unpleasant.
A simple notebook or phone note tracking what you added and when is surprisingly powerful. It makes patterns visible: which foods disappear fast, which linger and cause problems.
The most damaging belief in vermicomposting is that worms are resilient enough to handle neglect. People assume that because worms live in soil and eat rotting material, a bin is basically self-managing. It isn’t. A worm bin is a concentrated, enclosed ecosystem. The worm density alone — often 1,000+ worms per square foot — is far higher than anything found in nature. That density is what makes bins productive, and it’s also what makes them fragile.
When something goes wrong in a natural soil environment, worms migrate. In a bin, they can’t. They cluster at the lid, drop through drainage holes, or simply die in place. The owners who succeed long-term are the ones who treat bin maintenance as a 10-minute-per-week habit rather than a set-it-and-forget-it system. That mindset shift — more than any single technique — is what separates a thriving bin from a smelly box of dead worms after three months.
The clearest warning signs are worms clustering at the lid or walls (trying to escape), a sulfur or sour smell instead of an earthy one, and a bin that feels wet and slimy rather than moist and crumbly. If you see all three at once, stop feeding immediately, add a thick layer of dry shredded cardboard, and leave the lid slightly open for 24 hours. Most bins can be rescued within a week if you catch it early.
Coffee grounds are excellent worm food — slightly acidic, nitrogen-rich, and worms genuinely seem to prefer them. But they should make up no more than about 20% of your total feed volume. Adding them daily in large amounts will gradually acidify the bin below the comfortable pH range of 6.0–7.0. Mix them with shredded cardboard or crushed eggshells to buffer the acidity.
Probably not. A bad smell almost always means the bin is anaerobic — too wet, too compacted, or overloaded with nitrogen-rich food. Stop adding food for one week, mix in a generous amount of dry bedding, and gently aerate the material with a fork or your gloved hand. The smell should improve within 48–72 hours. If it doesn’t, check for a pocket of buried food that has gone completely rotten and remove it.
Every 2–3 days works well for a new bin. Bury a small amount — think a large handful, not a mixing bowl — and check whether the previous feeding has mostly broken down before adding more. Once the bin has been running for 2–3 months and the worm population has grown, you can increase frequency and quantity. Let consumption speed guide you rather than a fixed schedule.
Crushed eggshells serve both purposes in one step. They provide the grit worms need to grind food in their gizzard and they slowly buffer pH as they break down. Add a small handful every 2–3 weeks. Agricultural lime works too, but it’s easy to overshoot with powder. Eggshells are slower-acting and much harder to overdo, which makes them the better choice for most home bins.
White surface mold — often a fuzzy mycelium — is completely normal and actually beneficial. It’s part of the decomposition process and worms will eat it. What you don’t want is a slimy, dark, or foul-smelling mold that spreads aggressively, which signals anaerobic conditions rather than healthy fungal activity. If the mold is white and the bin smells earthy, leave it alone.
Every worm bin mistake on this list is recoverable — most of them within a few days if you catch them early. The pattern that separates successful vermicomposters from frustrated ones isn’t talent or equipment; it’s the habit of checking the bin every two to three days and making small adjustments before small problems become big ones. Keep bedding stocked, feed in proportion to your worm population, and treat moisture management as a weekly task rather than a one-time setup.
Give it 90 days of consistent, attentive management and you’ll have a system that practically runs itself — a thriving colony, a steady supply of finished castings, and the quiet satisfaction of watching kitchen scraps turn into something genuinely useful. The worms will do the work. Your job is just to keep conditions stable enough for them to do it.
Everything you need to get started with vermicomposting.
Share tips, ask questions and learn from thousands of worm lovers!
Join Community