

You’ve waited months and harvested a bucket of dark, crumbly castings. Now what? To use worm castings well, remember they’re concentrated, so the goal is to spread them where they’ll do the most good rather than piling them on.
How castings help plants
Castings improve soil in several ways at once:
- Gentle, slow nutrients. They release a broad range of nutrients gradually, without the risk of burning roots.
- Microbial life. They carry bacteria and fungi that help cycle nutrients in soil.
- Better structure. They improve water holding in sandy soil and help loosen heavy soil over time.
- Humus. They add stable organic matter that holds onto nutrients.
They’re a soil improver more than a fertilizer. For very hungry crops, you may still need additional feeding.
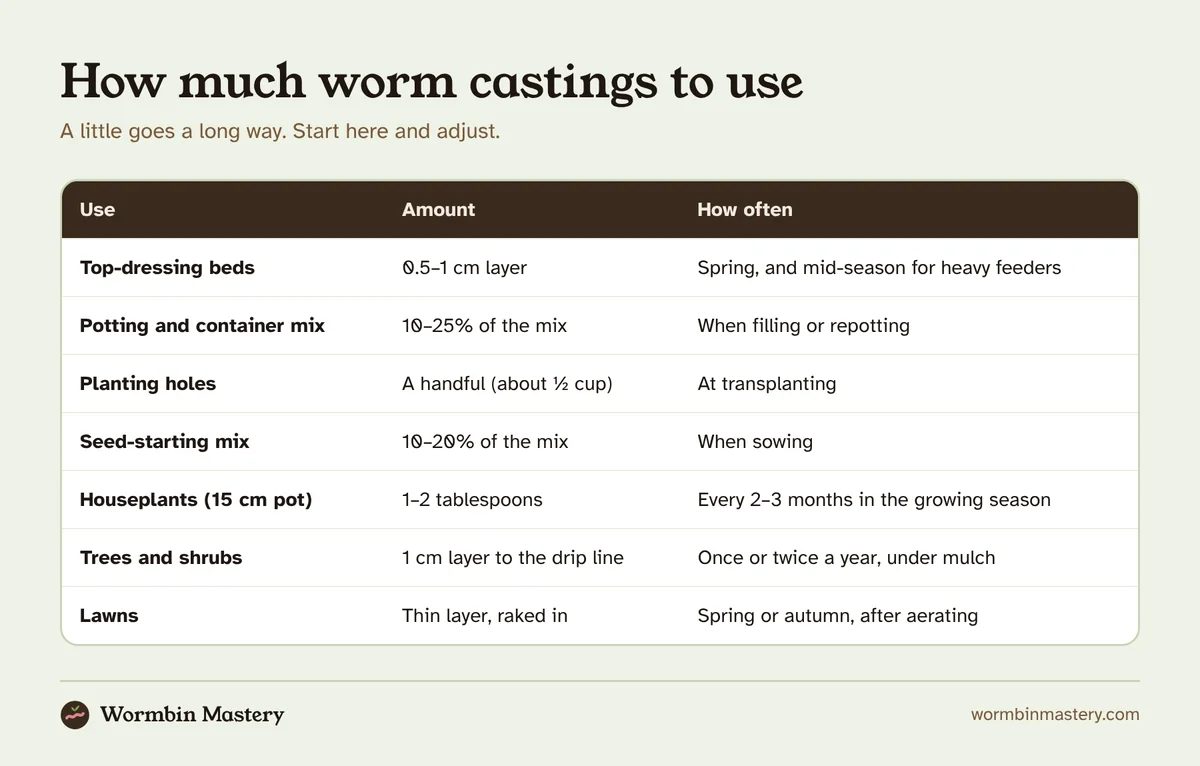
How much to use: worm castings rates at a glance
| Use | How much |
|---|---|
| Top-dressing garden beds | ¼–½ inch (0.5–1 cm) layer |
| Container and potting mix | 10–25% of the mix by volume |
| Planting holes | A handful, about ½ cup (120 ml) |
| Seed starting mix | 10–20% of the mix |
| Houseplants | 1–2 tablespoons per 6 inch (15 cm) pot, every 2–3 months |
| Lawns | A thin layer, raked in, in spring or autumn |
| Worm casting tea | See our worm tea guide |
These are starting points, not strict rules. Castings are forgiving.
 Related guideWorm Castings for Houseplants: How Much and How Often
Vegetable gardens
At planting
Add a handful of castings to each planting hole for transplants like tomatoes, peppers, squash and brassicas. Mix it with the soil at the bottom of the hole.
For direct-sown crops like beans, carrots and lettuce, sprinkle a thin line of castings in the furrow before sowing.
During the season
Side-dress established plants with a thin ring of castings around the base, keeping it a little away from the stem. Water it in. Repeat every four to six weeks for heavy feeders like tomatoes, cucumbers and squash.
Building beds
If you have plenty of castings, work a ½ inch (1 cm) layer into the top few inches of a new bed. For larger areas, combine castings with compost. Our guide to castings vs compost explains how they complement each other.
Houseplants
Houseplants get the most benefit per spoonful because they live in a small volume of potting mix.
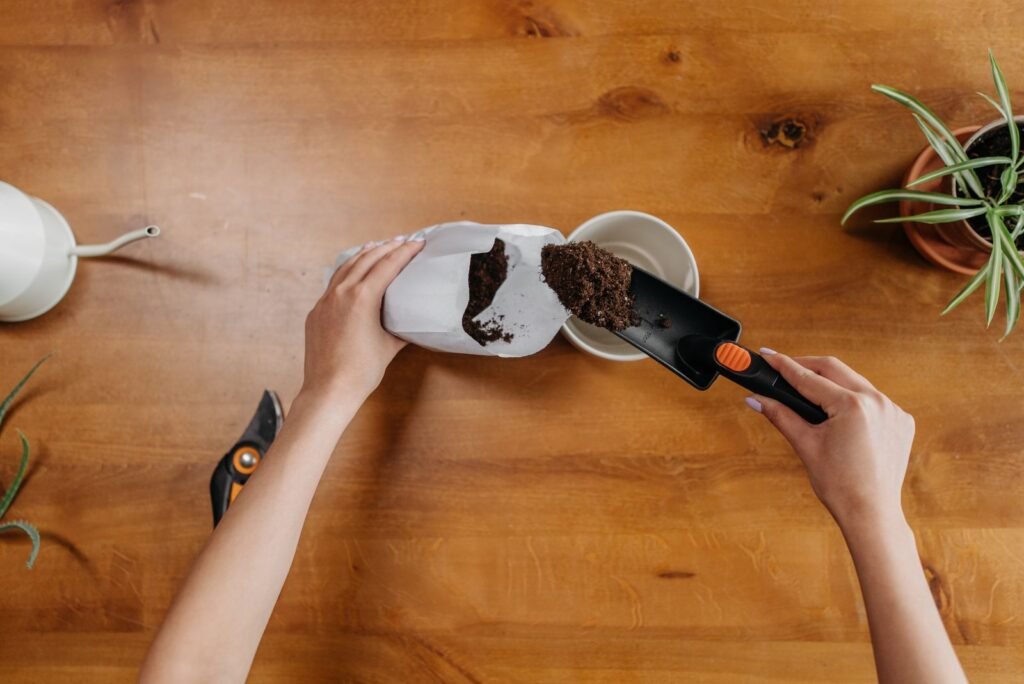
- Top-dress: scratch 1–2 tablespoons of castings into the surface of a 6 inch pot every two to three months during the growing season. Scale up for larger pots.
- Repotting: mix castings into new potting mix at 10–20% by volume.
- Watering: water as normal. Nutrients move down into the roots.
Use less for succulents, cacti and orchids, which prefer lean, fast-draining mixes. A teaspoon mixed into the top layer is plenty.
Containers and raised planters
Container plants rely entirely on their potting mix. Mix castings at 10–25% by volume when filling containers. Avoid going much higher: too many castings can hold excess water and compact over time.
Refresh containers by top-dressing with a thin layer of castings each spring.
Seedlings
Castings in seed-starting mix help young plants grow strongly. Keep the proportion modest, around 10–20%, so the mix stays light and drains well. Screen the castings first to remove lumps. Our full guide to using castings for seed starting has recipes.
Lawns
Rake a thin layer of screened castings over the lawn in spring or autumn, ideally after aerating. Water it in. Castings are expensive to use on large lawns if you’re buying them, so this is usually a job for home-made surplus or small areas.
Trees, shrubs and roses
Spread a ½ inch (1 cm) layer of castings on the soil from the trunk out to the edge of the canopy (the drip line), keeping it clear of the trunk itself. Cover with mulch to keep it moist. Do this once or twice a year.
Tips to use worm castings for best results
- Keep castings moist. Their microbial life does best when they don’t dry out completely before use.
- Water after applying. This moves nutrients and microbes into the root zone.
- Cover with mulch in the garden to protect castings from sun and drying.
- Mix rather than layer in pots, so castings are spread through the root zone.
- Screen for fine uses. Seed starting and houseplants benefit from screened castings. See our harvesting guide.
Can you use too much?
It’s hard to harm plants with castings, but it’s possible to overdo it:
- Pure castings as potting mix hold too much water and can stay soggy
- Very heavy use can concentrate salts, especially if your worms ate salty food
- More isn’t always better: plants respond well to modest amounts
If in doubt, use less and apply more often.
Storing leftovers
Keep surplus castings slightly moist in a breathable container in a cool, shaded spot. They stay useful for months.
Making a small batch go further
If you only have a few cups of castings, prioritize:
- Seedlings and young transplants, which benefit most from a gentle start
- Houseplants and containers, which live in a small volume of mix
- Heavy-feeding vegetables like tomatoes and squash, as a side-dressing
- Everything else with worm casting tea, which stretches castings over a larger area
Large garden beds and lawns are better served by compost, saving castings for where they count.
Further reading: UConn Extension’s Vermicomposting guide explains how to use worm castings in beds and potting mixes, and Oregon State University Extension’s Composting with Worms (EM 9034) covers it too.
Frequently asked questions
Can I use worm castings instead of fertilizer?
For many plants, especially houseplants and established perennials, regular castings are enough. Heavy feeders like tomatoes and corn often need additional nutrients, so think of castings as a soil improver with a mild feeding effect.
When is the best time to apply castings?
At planting, at the start of the growing season, and every four to eight weeks for actively growing plants. Avoid heavy applications to dormant plants in winter.
Do castings help plants resist pests and diseases?
Some gardeners and studies report healthier plants with fewer problems, possibly because of the microbes castings carry. Results vary, so treat this as a possible bonus rather than a guarantee.
Can castings go directly on plant leaves?
Solid castings shouldn’t sit on leaves. Many gardeners spray diluted worm tea on foliage instead. See our worm tea guide.