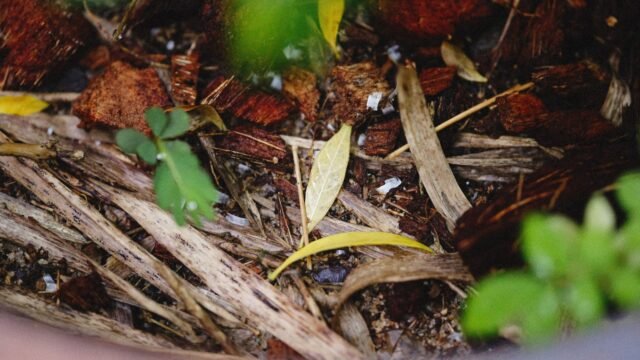

Three to six months after you start a worm bin, the bedding will have turned into something very different: dark, crumbly, earthy-smelling worm castings. This is the reason most people keep worms. When you harvest worm castings it doesn’t need to be messy, and you can do it without losing many worms.
When to harvest worm castings
Your bin is ready to harvest when:
- Most of the material is dark brown to black and crumbly, like rich soil
- You can’t recognize much of the original bedding or food
- It smells earthy, not sour
- The bedding level has dropped noticeably
- Worms seem less active or food is being processed more slowly
You don’t need to wait until every scrap is gone. Partly finished material can go back in the bin.

What you’ll need
- A tarp, large tray or sheet of plastic
- A container for finished castings: a bucket, bag or box
- Fresh, damp bedding to restart the bin
- Optional: a screen with ¼ inch (6 mm) mesh
 Related guideWhen Are Worm Castings Ready? 6 Signs It’s Time to Harvest
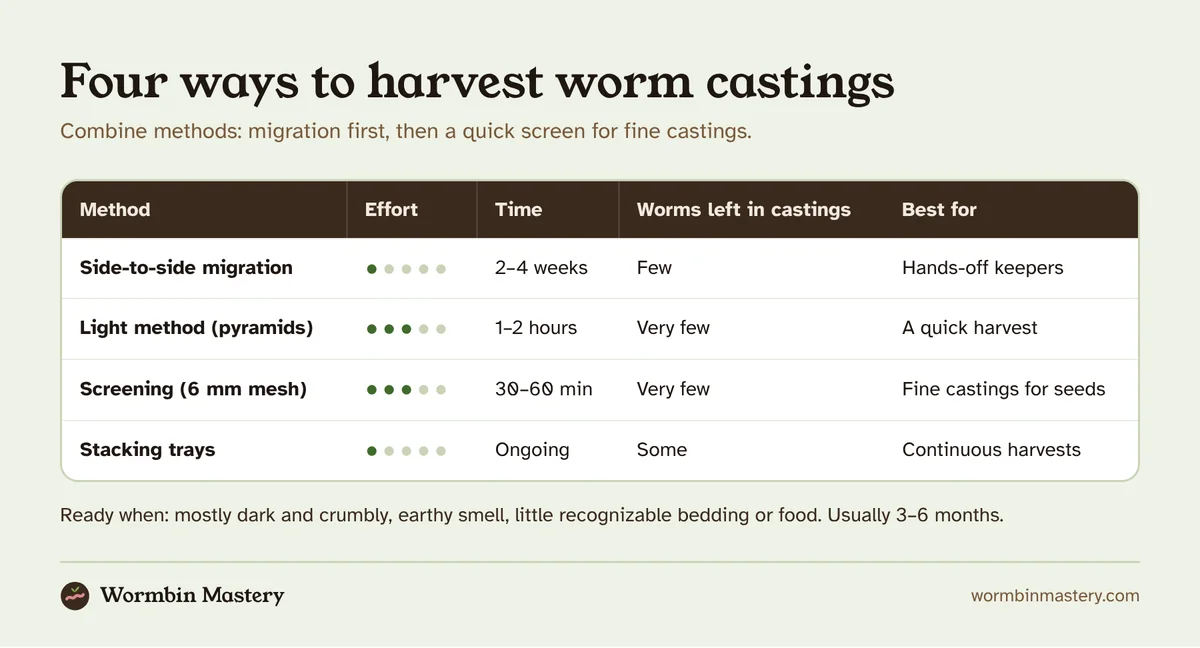
Method 1: Side-to-side migration
Effort: very low. Time: 2–4 weeks.
- Push all the bin’s contents to one side.
- Fill the empty side with fresh, damp bedding.
- Feed only on the new side.
- Wait two to four weeks while worms migrate toward the fresh food.
- Scoop out the old side, which will now be mostly worm-free castings.
Best for: people who aren’t in a hurry and want to avoid handling worms.
Downside: slow, and a few worms always stay behind. Cocoons stay in the old side and hatch later.
Method 2: Light method (pyramids)
Effort: moderate. Time: 1–2 hours.
- Tip the bin’s contents onto a tarp in bright light (indoors under a strong lamp, or outdoors on an overcast day; avoid direct hot sun).
- Form the material into several cone-shaped piles.
- Wait 10–20 minutes. Worms burrow away from the light, toward the center and bottom of each pile.
- Scrape off the outer layer of castings from each pile.
- Repeat every 10–20 minutes until you’re left with small piles that are mostly worms.
- Return the worms to a bin with fresh bedding.
Best for: a quick harvest without equipment.
Downside: hands-on and takes an afternoon. Keep piles moist and out of direct sun.
Method 3: Screening
Effort: moderate. Time: 30–60 minutes.
- Build or buy a screen of ¼ inch (6 mm) hardware cloth over a frame that fits on a wheelbarrow or tub.
- Shake or rub small batches of material through the screen.
- Fine castings fall through. Worms, cocoons and unfinished bedding stay on top.
- Return what’s on top of the screen to the bin.
Castings need to be slightly dry to screen well. Wet material clogs the mesh. Let it air-dry in shade for a day or two first if needed.
Best for: fine, uniform castings for seed starting or potting mixes. Screened castings are ideal for seed starting.
Downside: messy, and you’ll handle some worms.
Method 4: Stacking trays
Effort: very low. Time: ongoing.
In a stacking system, you add a new tray of bedding and food on top of the full one. Worms move up through holes in the base to reach fresh food. After a few weeks, the bottom tray is mostly castings.
You can make a homemade version with two totes. See our DIY tote bin guide.
Best for: continuous harvesting with minimal effort.
Downside: some worms stay in the lower tray, especially if it’s still moist and has food. Stop feeding the lower tray completely.
Mix and match
Many people combine methods: migration to get most worms out, then screening to refine the castings. Or the light method followed by a quick screen.
Saving cocoons and baby worms
Harvested castings always contain some cocoons and tiny worms. To save them:
- Let the castings rest in a container for a few weeks, then put a slice of melon on top. Young worms gather under it and can be returned to the bin.
- Return screen leftovers, which often contain cocoons.
- Or simply accept that some will go to the garden, where they’ll do no harm.
Our guide to how worms reproduce explains cocoons and hatching.
Storing castings
- Keep them slightly moist. Bone-dry castings lose some of their microbial life.
- Store in a breathable container: a cloth bag, a bucket with a loose lid or a cardboard box. Airtight containers can turn anaerobic.
- Keep them in a cool, shaded spot.
- Use them within a few months for the most benefit, although they remain useful for much longer.
Restarting the bin
After harvesting, refill the bin with fresh damp bedding, return the worms and a scoop of old castings to bring microbes along, and feed lightly for the first week. Our bedding guide has mix ideas.
What to do with your castings
Now the fun part. Our guide to how to use worm castings covers application rates for vegetables, houseplants and lawns. You can also brew worm casting tea. Curious how castings compare to regular compost? Read castings vs compost.
Harvesting checklist
- Most of the bin is dark and crumbly
- Fresh bedding prepared and damp
- Tarp or tray ready
- Container for castings
- Screen (optional)
- Shaded work area, out of hot sun
- A small feeding ready for the restarted bin
Further reading: Oregon State University Extension’s Composting with Worms (EM 9034) has a full section on how to harvest worm castings, and UConn Extension’s Vermicomposting guide covers it too.
Frequently asked questions
How often should I harvest worm castings?
Most home bins are ready every three to six months. Busy, warm bins may be ready sooner.
How many castings will I get?
It depends on bin size and how much you feed. A typical 14–18 gallon home bin might produce a few gallons of castings every few months.
Can I leave worms in the castings?
A few worms in castings applied to the garden is fine. They’ll survive in rich mulch and compost, though not usually in bare soil.
Why are my castings sticky?
Sticky castings are too wet. Spread them in a shaded spot to dry slightly before screening or storing.