

You don’t need to buy an expensive kit to keep worms: a DIY worm bin works just as well. Two opaque plastic storage totes, a drill and about 45 minutes will give you a bin that works as well as most store-bought systems. The nested design catches excess liquid so your floor stays clean and the bedding doesn’t get waterlogged.
Parts list
- 2 identical opaque storage totes, 10–18 gallons (40–70 liters), with one lid
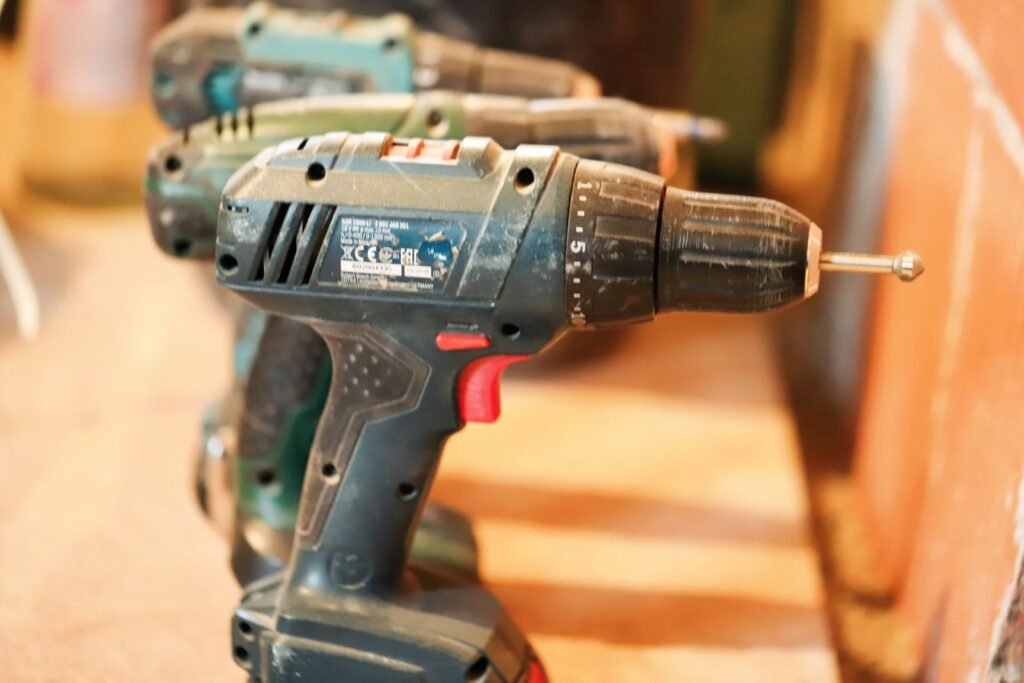
- Drill with ¼ inch (6 mm) and ⅛ inch (3 mm) bits
- 2–4 spacers: bricks, upturned plastic cups or short wood offcuts
- Optional: fine mesh or an old pair of tights to cover holes
- Bedding and worms (see how to start a worm bin)
Why two totes?
The inner tote holds the worms, bedding and food. Liquid that drains from the bedding drips through holes in its base into the outer tote, which acts as a sump. Spacers keep the two apart so the inner bin never sits in its own runoff. This one design choice prevents the most common beginner problem: a soggy, smelly bin.
Choosing the right totes
Opaque, not clear
Worms avoid light. In a clear tote they’ll crowd into the center and avoid the walls. Dark or solid-colored totes work best.
Shallow and wide
Composting worms feed in the top 6–10 inches (15–25 cm) of bedding. A wide, shallow tote gives them more feeding surface than a deep, narrow one. Aim for a depth of 10–14 inches (25–35 cm).
Food-safe or at least sturdy
Most polypropylene storage totes (recycling code 5) are fine. Avoid thin, brittle plastic that cracks when you drill it.
Size for your household
A 10–14 gallon tote suits one or two people. Go for 18 gallons for a family. If you’re unsure, our guide to how many worms you need explains how bin surface area relates to food scraps.
 Related guideThe Best Place for a Worm Bin, Indoors and Outdoors
Step-by-step DIY worm bin build
Step 1: Drill drainage holes in the inner tote
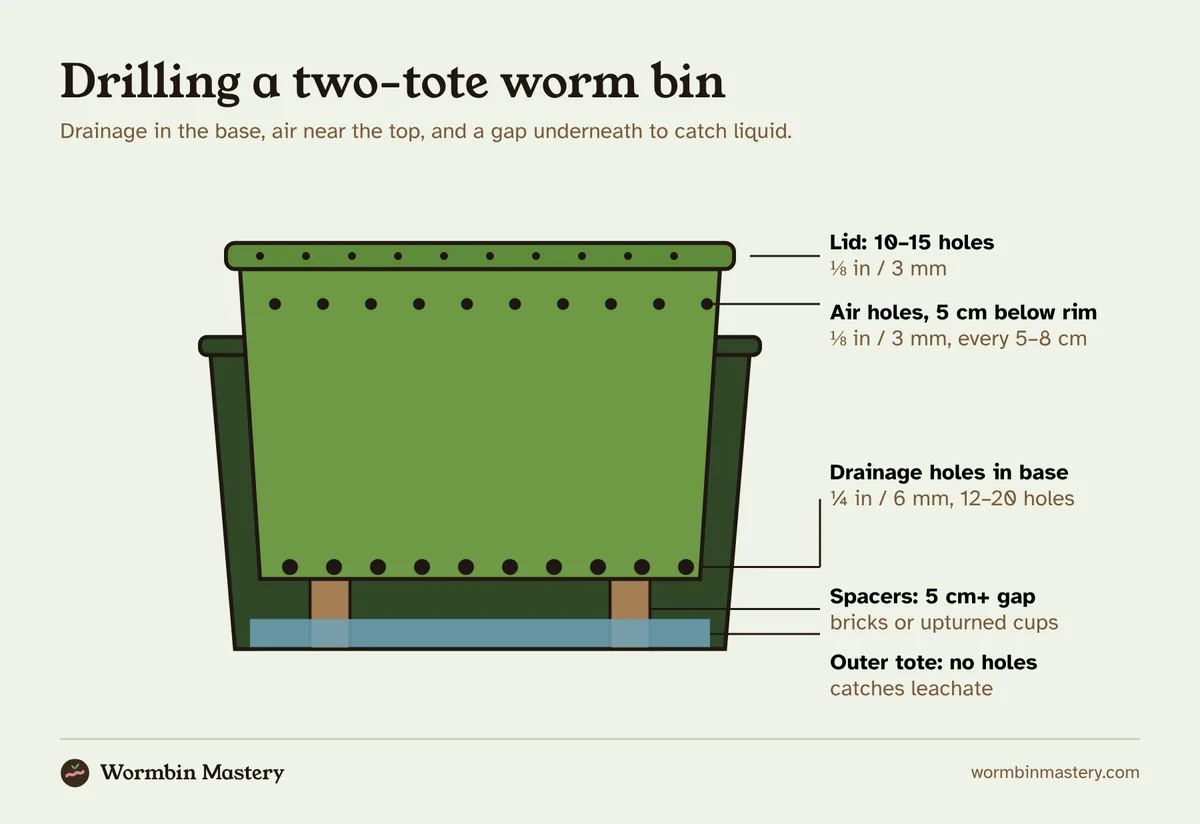
Turn the inner tote upside down. Drill 12–20 holes of ¼ inch (6 mm) across the base, spread evenly and about 2–3 inches (5–8 cm) apart. These let excess water escape.
Drill slowly with light pressure. Fast drilling melts and cracks plastic. If your drill has a speed setting, use a low one.
Step 2: Drill air holes near the top
Drill a row of ⅛ inch (3 mm) holes around all four sides of the inner tote, about 2 inches (5 cm) below the rim and 2–3 inches apart. Air enters here and moves through the bedding.
Smaller holes keep worms in and fruit flies out better than large ones. If you’re worried about escapees or pests, glue or tape fine mesh over the inside of the holes.
Step 3: Ventilate the lid
Drill 10–15 ⅛ inch holes across the lid. Warm, moist air rises and escapes here, which stops condensation dripping back onto the bedding.
Step 4: Set up the outer tote
Place two to four spacers in the bottom of the outer tote. Bricks work well. Upturned yogurt pots or plastic cups are fine for lighter bins. You want at least 2 inches (5 cm) of space between the two bases.
Don’t drill any holes in the outer tote. Its job is to catch liquid.
Step 5: Nest and fill
Set the inner tote on the spacers. Fill it two-thirds full with damp bedding: shredded cardboard, coconut coir and a handful of soil. Our bedding guide compares materials, and the bedding ratio calculator works out quantities for your tote size.
Step 6: Add worms and a small meal
Add your worms on top and leave the lid off under a light for 20 minutes so they burrow down. Bury about a cup of soft scraps in one corner and close the lid. Then follow the first-week plan.
Where to put your tote bin
- Indoors: under a sink, in a laundry room or a kitchen corner. A tray under the outer tote catches any accidental spills.
- Outdoors: full shade only. Raise it off hot paving and move it inside or into a garage during heatwaves and freezes. See our guides to summer heat and the safe temperature range.
- Balcony: fine in shade, but check that runoff can’t drip onto neighbors below.
Maintaining a DIY worm bin
Empty the sump
Check the outer tote every week or two. Pour off any liquid. This is leachate, not worm tea. It can be diluted about 1 part to 10 parts water and used on ornamental plants, or poured onto a compost heap. Our worm tea guide explains the difference.
Watch for condensation
A few drops under the lid are normal. Constant dripping means the bin is too wet or lacks airflow. Add dry cardboard and drill a few more lid holes.
Clean the holes
Drainage holes sometimes clog with castings. Poke them clear with a pencil when you harvest.
Upgrades worth considering
A third tote for easy harvesting
Build a second inner tote with the same holes. When the first is full of castings, sit the new one directly on top of the bedding and start feeding only in the top tote. Worms migrate upward over a few weeks, leaving mostly worm-free castings below. It’s a homemade version of a stacking system. Our guide to harvesting castings covers this and three other methods.
Insulation for cold spots
Wrap the outer tote in an old blanket or set it in a cardboard box lined with foam board for winter. Don’t block the air holes.
A drain tap
If you’d rather not lift the inner tote to empty the sump, fit a small plastic tap near the base of the outer tote. Garden centers sell rain barrel taps that work well.
Further reading: Oregon State University Extension’s Composting with Worms (EM 9034) shows a similar nested two-tote DIY worm bin, and NC State Extension’s Worms Can Recycle Your Garbage has drilling guidance.
Frequently asked questions
How many holes does a worm bin need?
There’s no exact number. As a guide, 12–20 drainage holes in the base and a row of air holes every 2–3 inches around the top work for a 10–18 gallon tote. If the bin stays wet, add more air holes. If it dries out fast, cover some.
Can I use a single tote instead of two?
Yes, if you’re careful with moisture. Drill air holes but skip the drainage holes, and use extra dry cardboard to soak up liquid. Many people find the two-tote design more forgiving.
Will worms escape through the holes?
Healthy worms in good conditions stay put. Worms escape when something is wrong, such as bedding that’s too wet, too acidic or too hot. If you see lots of escapees, read why worms leave the bin.
Is plastic safe for worms?
Common storage tote plastics are stable and widely used for worm bins. Avoid containers that previously held chemicals, and avoid putting a plastic bin in direct sun, where heat is a far bigger risk than the plastic itself.


